The EW-D features Auto Scan functionality to streamline set up and optimize functionality with added Smart Assist App control.
EW-D Auto Scan and Synchronisation
Performing Auto Scan on the Receiver
To access Auto Scan from the receiver, press the SET button to move the menu to the right side of the screen. Use the arrow keys to scroll and select Auto Scan, then press SET to begin scanning.
When a frequency is displayed:
- Press SET to confirm the displayed frequency,
- Or press the up arrow to search for the next available frequency.
Press SET to finalize (press Esc to return).
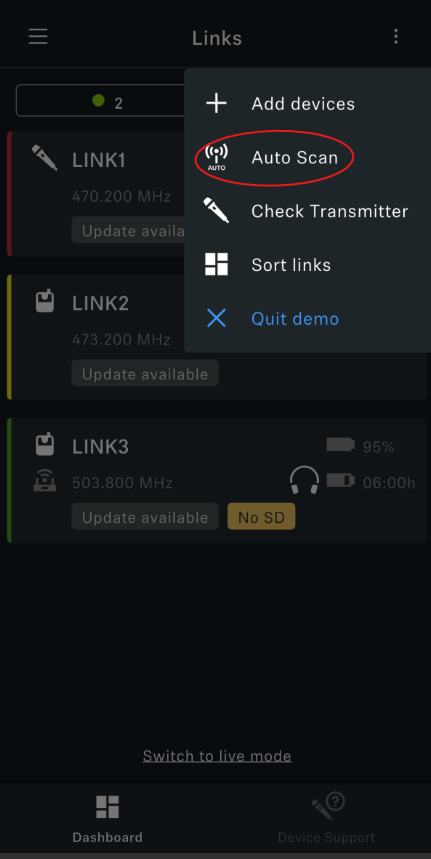
You may also initiate an Auto Scan via the Smart Assist app if the EW-D receiver has been paired with the application. This option is accessible by tapping the three dots in the top right corner of the app screen, where you can Add, Edit, update devices, as well as launch Auto Scan.
Note: If you have added multiple receivers to your configuration, the Auto Scan function will scan all receivers to locate new frequencies.

Synchronisation Between Transmitter and Receiver
After selecting a frequency, the next step is to synchronise the transmitter with the receiver to ensure both operate on the same frequency. On the receiver, briefly press the SYNC button. The blue Data LED on the receiver will begin flashing.
On the transmitter, briefly press the SYNC button to complete the synchronisation process:
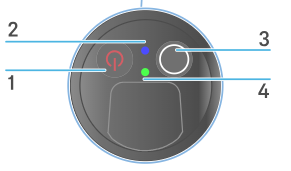
- If the transmitter is handheld, the button is located at the base of the microphone, next to the power button.

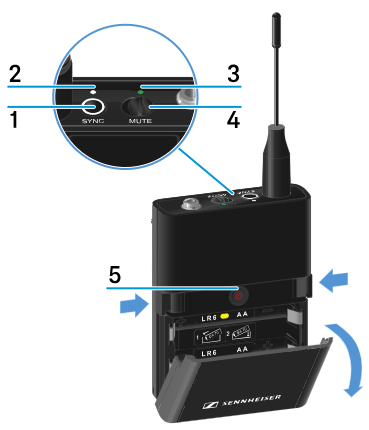
- If the transmitter is a bodypack, the SYNC button is located on the top panel, between the antenna and the MUTE switch.

Once pairing is complete, the LINK LED on both devices will illuminate green.
Important: The SYNC button should only be pressed briefly (under 2 seconds) during the pairing process. Holding the SYNC button for too long will activate firmware update mode and cancel the pairing connection.