For analog synth enthusiasts, ensuring precise oscillator frequency calibration is essential to maintain stable, accurate, and authentic sound. This article provides a detailed step-by-step guide to calibrating the Behringer Odyssey Synthesizer, helping you achieve optimal accuracy for both oscillators (VCO1 and VCO2).
Preparation Before Calibration
Before starting, make sure the device and environment are stable to ensure accurate calibration results.
Warm up the unit:
Turn on the Behringer ODYSSEY and let it run for at least 30 minutes. This crucial step allows the oscillators to reach thermal stability, ensuring accurate tuning.
Required tools:
-
Small screwdriver (eyeglass type) for adjusting trim pots
-
Oscilloscope or equivalent frequency measuring software (Soundcard Oscilloscope can be used if you don’t have hardware)
-
Audio recorder or computer for monitoring the output frequency
Locate the trim pots:
Behringer Odyssey features three trim pots:
Configure Odyssey Before Calibration
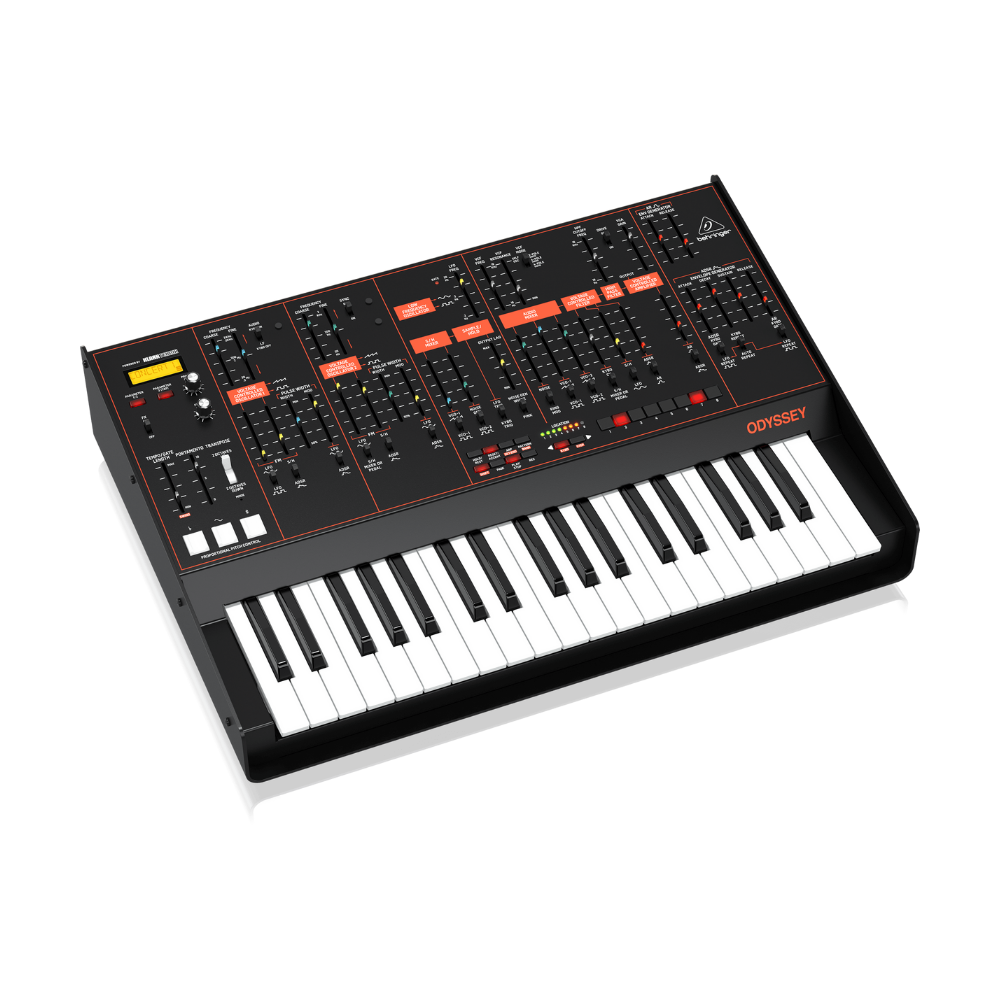
Set the following parameters to ensure the device is in a standard state:
-
TRANSPOSE: Normal / Central position
-
VCO1 & VCO2: Select Square WAVE
-
VCF Frequency: Maximum
-
VCA Gain: Maximum
-
VCO1 & VCO2 Fine Frequency: Midpoint
-
VCO1 Audio Switch: KYBD ON
-
VCO2 Sync: OFF
-
Set all other faders to the lowest position
Detailed Calibration STEPS
Connect and monitor the signal
Connect the HIGH OUTPUT of the Behringer Odyssey to a computer or oscilloscope.
Open a frequency monitoring tool to observe oscillator output in real-time.
Step 1: Calibrate VCO1
-
Raise the VCO1 (Audio Mixer) Fader to maximum
-
Hold the Low C key on the keyboard
-
Adjust VCO1 COARSE FREQUENCY until the display shows 130.8 Hz
-
Hold the High C key
-
Using the screwdriver, adjust VCO1 V/OCT trim pot (next to OSC1) until the display reads 1046.5 Hz
-
Lower the VCO1 (Audio Mixer) fader to minimum
Step 2: Calibrate VCO2
-
Raise the VCO2 (Audio Mixer) fader to maximum
-
Hold the Low C key
-
Adjust VCO2 COARSE FREQUENCY until it reads 130.8 Hz
-
Hold the High C key
-
Using the screwdriver, adjust VCO2 V/OCT-1 trim pot (next to OSC2) until it reads 1046.5 Hz
Step 3: Calibrate VCO2 V/OCT-2
-
Hold both High C and Low C keys simultaneously (you may ask for assistance or tape the keys)
-
Make sure OSC2 Level is at maximum and OSC1 Level is at 75% or lower
-
Target frequency: 1046.5 Hz
-
If the frequency is still near 130.8 Hz, gradually lower OSC1 Level
-
Using the screwdriver, adjust VCO2 V/OCT-2 trim pot until it reaches exactly 1046.5 Hz
Finalizing the Calibration
Once all steps are completed, both VCO1 and VCO2 are precisely aligned, ensuring stable pitch and harmonic consistency across the keyboard’s range.
Expert Tips
-
Perform calibration in a quiet, temperature-stable environment.
-
Use a regulated power supply to avoid frequency drift during the process.
-
For regular performers or studio users, schedule calibration every 6 months to maintain peak performance.
Conclusion
Calibrating your Behringer Odyssey not only ensures accurate operation but also preserves the pure analog sound quality that defines the legacy of the classic ARP Odyssey faithfully recreated by Behringer.
DEEPMIND 6X Analog Synthesizers...
2,004
True Analog 6-Voice Polyphonic Synthesizer with 4 FX Engines, 2 OSCs and LFOs per Voice, 3 ADSR Generators, 8-Channel Modulation Matrix, 32-Step Control Sequencer and Tablet Remote Control
4 simultaneous world-class TC Electronic and Klark Teknik FX with over 30 algorithms including Reverb, Chorus, Flanger, Phaser, Delay and Multi-Band Distortion
6 voices with 2 analog OSCs per voice with oscillator sync mode
2 LFOs per voice with 7 waveform shapes, key sync, MIDI sync and envelope auto-triggering