With the EW DX, you can either be updating the firmware with Wireless Systems Manager software (Mac + PC) or Control Cockpit (Windows only) depending on what the end goal /deployment of the system is.
WSM is typically used for frequency coordination in live applications, while Control Cockpit is designed for device management and network control.
Note: If both programs are installed on the same system, Control Cockpit’s web service will override WSM by default on Windows. To use WSM, stop the Control Cockpit service by right-clicking its icon in the task tray and selecting Stop Running Service before launching WSM.
Updating EW DX firmware with Wireless Systems Manager (WSM)
1. Connect your computer running WSM and the EW DX receivers via Ethernet to establish a Local Area Network (LAN).
If only one EW DX system is used, connect the receiver’s Ctrl port directly to your computer. For multiple systems, use a network switch.
2. Open WSM. In the System dropdown, enable Remote Control and Online Mode. The EW DX should appear in the System Pane. If it doesn’t:
- On the EW DX receiver, press the jog wheel to access its menu.
- Scroll to Network and press the jog wheel to enter.
- Verify the IP address here, which can be manually added in WSM’s System Pane, or set to Auto IP / mDNS discovery.
The latest firmware file can be downloaded from Sennheiser’s EW DX product pages under Downloads > Firmware Updates.
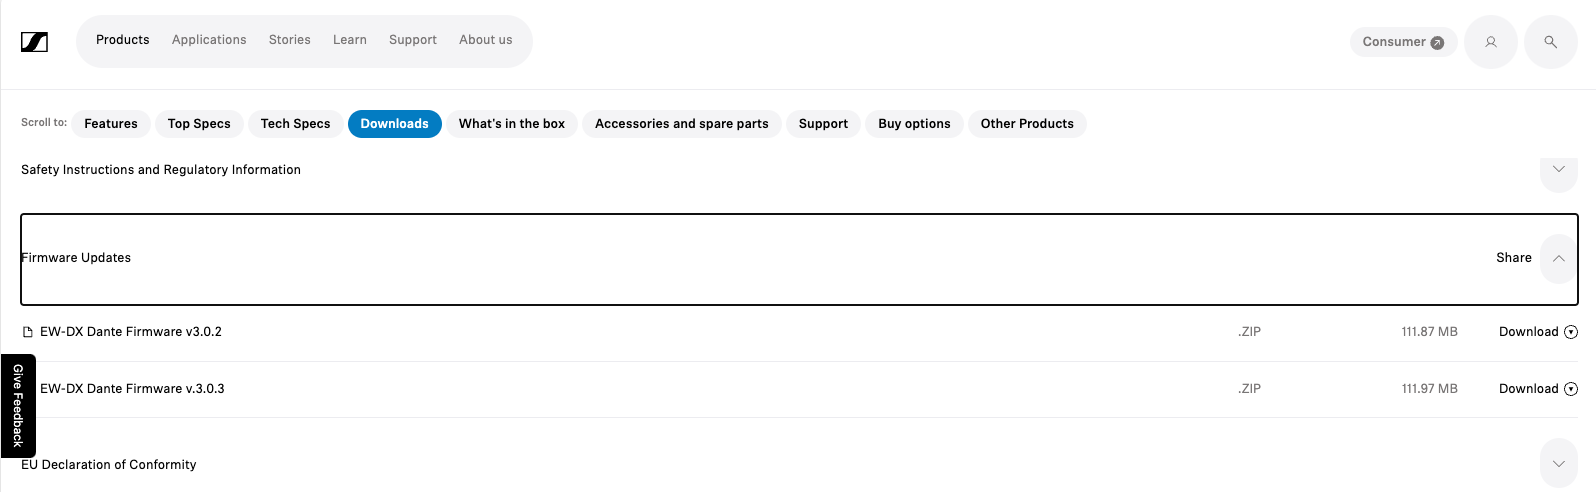
Note: Dante versions of EW DX use a different firmware file from the non-Dante EW DX EM2.
Firmware files are zipped. On Windows, right-click the downloaded file and select Extract All before updating.
3. In WSM, go to Applications > Firmware Update.
4. Browse to the extracted firmware file (extension: .SENNPKG).
5. Click Open, then Next.
6. Check your EW DX device in the Connected Device list (left pane) and click Start.
7. Once complete, the EW DX will power cycle automatically.
8. Click Finish when prompted.
Alternative: updating EW DX firmware with Control Cockpit
1. Connect your PC running Control Cockpit and the EW DX receivers over Ethernet to establish a Local Area Network (LAN).
If updating one system, you can connect directly. For multiple systems, use a network switch.
2. Open Control Cockpit from the task tray: right-click the icon, select Start Service, then right-click again and select Open Cockpit to open the browser interface.
3. Connected EW DX systems will appear under the Devices tab. Select one and go to the Device tab under Properties.
4. In the dropdown, select the latest firmware update, check the box to accept the license agreement, and press Update.
5. Wait for the device to update and power cycle. Once back online, you can update other units and transmitters from the Device List.
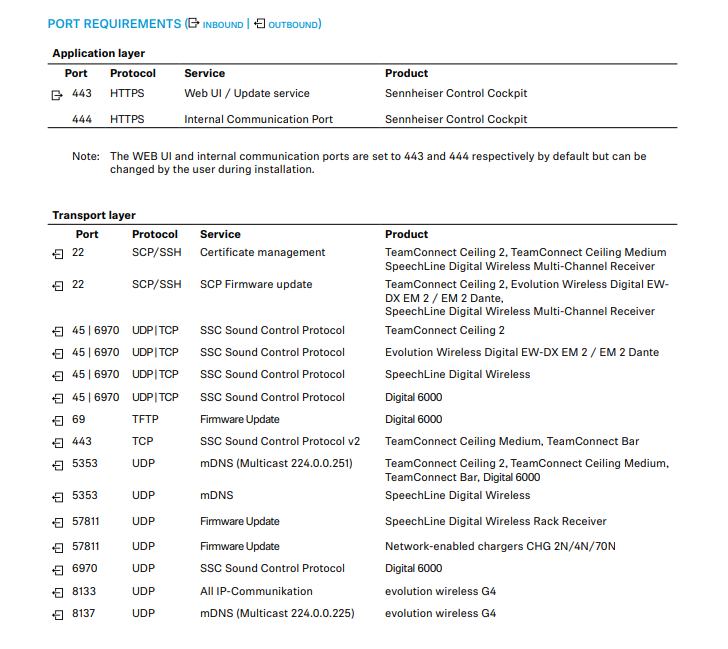
Note: For Control Cockpit operation and firmware updates, the following ports must be open — especially port 22 (SCP/SSH).
Updating EW DX transmitters
Updating a receiver as described above will load the transmitter update onto it. To update transmitters:
Once receiver firmware updates are complete, turn on the microphone transmitters and sync them with their receivers.
On the receiver, navigate to System Menu > TX Update and press the jog wheel to begin.
Press and hold the Sync button on the transmitter for 3 seconds. Do not power off the transmitter during the update process.