In any recording system from a home studio to a professional recording facility properly connecting a microphone to an audio interface is a fundamental factor that determines input signal quality. Many common audio issues such as noise, weak signal levels, distortion, or even complete microphone failure often stem from incorrect connection methods.
This article provides a detailed guide, covering both technical principles and practical steps, to help you understand how to connect a microphone correctly, safely, and in a way that optimizes recording quality.
The role of a preamp in a Microphone system
A microphone produces an electrical signal at a very low level (mic level). For this signal to be processed, recorded, or routed through an audio system, it must be amplified to line level. This task is performed by a Microphone preamp.
Most modern audio interfaces for home studios come with built-in preamps. For beginners, an integrated preamp is usually more than sufficient. Investing in an external preamp only becomes truly necessary when you want to enhance tonal character, detail, and headroom in your recordings.
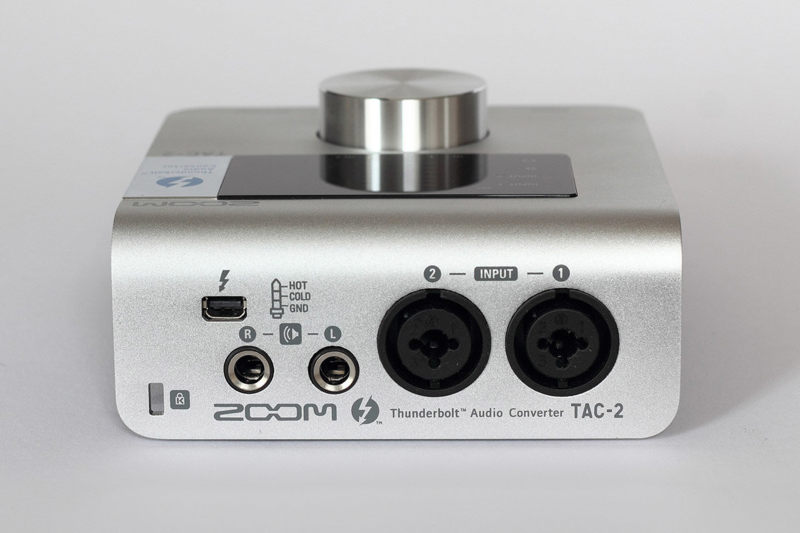
What is a combo XLR/TRS jack and why choosing the correct input matters
Many modern audio interfaces use a combo XLR/TRS jack, allowing flexible connection of different signal types through a single physical port.
- Outer ring: XLR input dedicated exclusively to Microphones
- Center jack: TRS input used for line-level signals or instruments
Important: A microphone must always be connected to the XLR section. Plugging a Microphone into the TRS input will result in very weak signal, excessive noise, or no signal at all.
This is a common mistake among beginners, especially when accidentally using a “ Microphone cable” with a TRS connector on one end. Such cables are typically intended for karaoke or consumer devices and do not meet studio standards.
What is a condenser microphone and why phantom power is required
Condenser microphones use an ultra-thin diaphragm and active internal electronics, which require an external power source to operate. This power source is known as 48V phantom power.
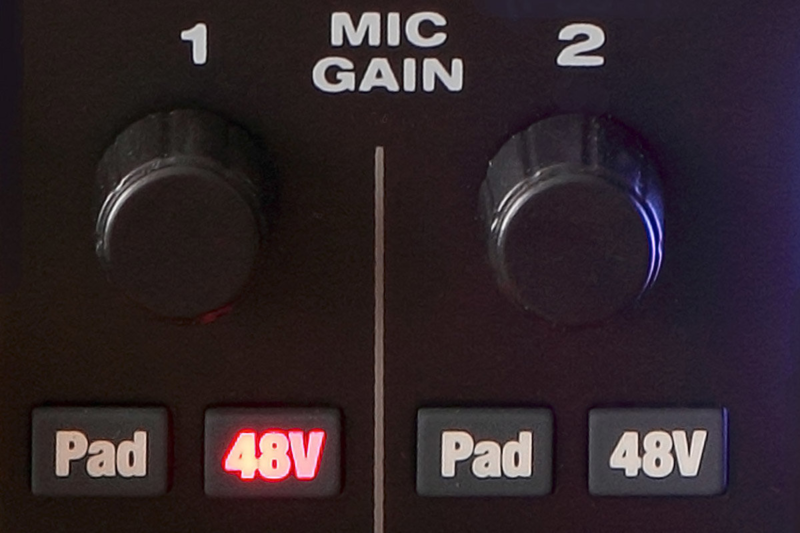
Phantom power (P48) is an international standard and is available on most modern audio interfaces and mixers. The activation switch is commonly labeled “48V”, “P48”, or “Phantom”.
Some devices use a single phantom power switch for all microphone inputs, while higher-end models allow independent on/off control per channel. In addition, certain interfaces require phantom power to be enabled through control software.
How to safely supply phantom power to a condenser microphone
When supplying phantom power to a condenser microphone, observe the following guidelines:
- Always connect the microphone before turning on phantom power
- Do not plug in or unplug the microphone while P48 is enabled (avoid hot plugging)
- Connect the microphone directly to the XLR input of the audio interface
- Avoid placing intermediate devices between the microphone and the mic input
Intermediate devices such as patchbays or low-quality adapters can block phantom power, degrade signal quality, or introduce noise.
Do dynamic Microphones require phantom power?
Dynamic microphones (including moving-coil and passive ribbon Microphones) do not require phantom power to operate.
If an audio interface has a single global phantom power switch and you are using both dynamic and condenser microphones, phantom power will not affect dynamic Microphones as long as the system is wired correctly using balanced connections.
However, for ribbon microphones, especially passive ribbon designs, it is strongly recommended to turn off phantom power to ensure maximum safety, as the ribbon element is extremely thin and sensitive.
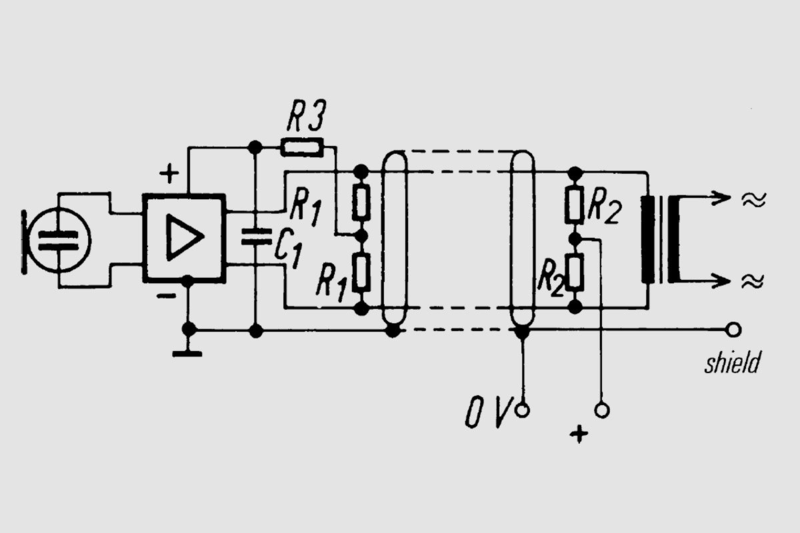
The technical nature of 48V phantom power
Studio microphones use a balanced connection with three pins: hot, cold, and ground. The audio signal exists between the hot and cold pins, while ground provides noise rejection.
Phantom power is DC voltage applied equally to both signal pins (hot and cold). Because there is no voltage difference between them, dynamic microphones do not “sense” phantom power.
P48 operates at 48V ±4V, supplied through 6.8 k& OMEGA; resistors, which limit current to a safe level.
Common mistakes when connecting studio microphones
Below are the most common mistakes when connecting studio microphones:
- Connecting a microphone to a TRS input instead of XLR
- Forgetting to enable phantom power for condenser microphones
- Using unbalanced or non-standard microphone cables
- Hot plugging microphones while phantom power is enabled
- Using intermediate devices that cause signal loss
Conclusion
Understanding how to properly connect a microphone to an audio interface not only helps you avoid technical issues but also ensures stable, clean, and detailed recordings. By selecting the correct XLR input, using proper cables, enabling phantom power at the right time, and following safety best practices, you establish a solid foundation for any recording project.